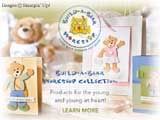
I was working with my friend, and fellow demostrator Laurie and she came up with the idea of using the magnetic bear and clip board sold by Stampin' Up! to make a calendar board, where you could change the outfit on the bear to fit the season. Again, here she ran into a few bumps, but did have a final project to share. Laurie actually dressed her bear up more appropriately.

Finally, one last picture to share. I was using a lot of scraps cutting out the 4 bears and accessories and Laurie's cat (Oscar) decided that right then and there it was a good place to take a nap.

Things I Learned:
1. It took me almost 6 hours to cut and mount the four bears.
2. If the magnet it thin enough, the sizzlet will actually cut through it.
3. The more layers of clothing, the less chance of them staying on the bear with movement.
4. The magnets do sometimes "fight" with each other and so the layers won't exactly lay where you want them to. (The magnetic fields oppose each other).
5. To get the bear to hang vertically and have a chance of keeping clothes on them, it's best to stick magnets on the back to the bear that will also stick to the clothing. Laurie did this using little closure magnets and it kind of looked like the bear was in the hospital with electrodes on him all over.
6. It's best to run the whole sheet of magnet through the big shot and then cut the accessories separately and adhere to the magnet (at least to save magnet and ensure each accessory is the desired color).
7. A spin off number 3, consider gluing a couple of layers of clothing before adhering to the magnet. For example, I glued the jacket to the T-shirt and then made the combination one magnet to eliminate a layer.
I'm sure there are many more things that I forgot, but before I make this a class, I think I really need to simplify it, so any suggestions would be great.


.png)
6 comments:
your cat is toooooo cute.. and much like my own kitty Mocha who will of course come and lay on my projects.
Sounds like a fun class! If I had a 6-year old, I'd so be there. :)
Great post, Tina! Yes, we had several bumps along the way and I am also looking forward to ideas/suggestions people have for either of the 2 projects! And, yes, Oscar (the cat) LOVES to be right in the center of the action all the time so he found this to be a pretty great spot for some attention getting (and a little snooze)!
Laurie (the one working with Tina!)
Very cute! Kids would love this.
Great post..sounds like a lots of fun..
Thanks for sharing...
--
Michell
Are you scared to be alone at home need security
I love your section of "what I learned". I too was having issues with the clothes staying on. I thought it was just me. I hope you will share anything that will make this a great class with us.
Thanks again, Cindee
Post a Comment