


Thursday, August 27, 2009
Holiday Mini Sneak Peak
Here is another sample that I made using a set from the Holiday Mini catalog, available September first, Serene Snowflakes. I also actually used non in-color cardstock and ink! A first for me since I think the new in-colors were introduced. Color are Night of Navy, Tempting Turquoise, and Whisper White. I also used the iridescent embossing powder.

Tuesday, August 25, 2009
RazzleDazzle Sample
Here is a sample that I made a while ago for a swap. (I like those swaps, can't you tell?) I used Razzle Dazzle and Teeny Tiny Wishes along with Soft Suede and Rich Razzleberry cardstock and ink. I'm going out of town beginning tomorrow, but I will try to schedule some posts for while I'm gone.


Monday, August 24, 2009
More Delightful Decorations Sample
So remember the previous post and the post prior to that, with the Delightful Decorations? Well Laurie was playing with it again and came out with yet another version of it. I this is the final one that she is using for her Chirstmas Card Club tomorrow night. She made up another card with this set to show as a sample and me, being the difficult one that I am, requested to do half and half. I guess that's the advantage you get for being friends and helping design the cards :o) Here are the two cards that I get to make.


Friday, August 21, 2009
Swap Sample
Whew! I made 75 cards last night for swaps! I did have them all designed, but needed to put them together. I have about 20 more to go too. Remember the card that I last posted about, designed by Laurie posted here? I redesigned it a little and this is what I cam up with. The recipe is the same with the exception of the white grosgrain ribbon instead of the silver cord. It's not my favorite design, but it works.

Wednesday, August 19, 2009
Delightful Decorations
Just wanted to share a card that Laurie also managed to design the night of Build-A-Bear fun. You may recognize the layout from one of the cards she designed for the Stampin' From Our Hearts event pictured here. But she used current paper and a stamp set from the upcoming Holiday Mini (available to order from beginning Sept 1). The stamp set is Delightful Decorations, with the matching ornament punch. The greeting is also from a new set in the Holiday Mini, Four the Holidays. She also used the Holiday Lounge DSP. I had a very minor role in helping with the design, but I will be using this for one of the swaps that I'm in too. Cardstock is Sahara Sand and Real Red. Laurie is using it for her Christmas Card Club (of which I am also a member of) where for the next 4 months, she designs and prepared a different card each month and the members have the option of making 10 or 15 cards. If you're interested in joining, contact me and I will be happy to forward you to her.

I have about 10 other swaps that I signed up for, so stay tuned for pictures of those. Enjoy!

I have about 10 other swaps that I signed up for, so stay tuned for pictures of those. Enjoy!
Tuesday, August 18, 2009
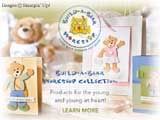
Magnetic Build-A-Bear
I spent the majority of yesterday playing with my Big Shot and Build-A-Bear dies. At covention this year they showed magnetic Build-A-Bears (so I was told, I was unable to attend this year) and I thought I would do a Build-A-Bear workshop, where the mom and kid would make a bear and the clothes to go with it and all would be magnetic so it would kind be like magnetic paper dolls. I bought magnetic sheets that have one side with adhesive and started to play. I ran into a few bumps (okay a lot of bumps) along the way, but finally came up with a finished product. I created this one and stuck it to a tin can that I purchased at Micheal's. I was having fun and made my bear a cross-dresser with white tights and pink skirt.

I was working with my friend, and fellow demostrator Laurie and she came up with the idea of using the magnetic bear and clip board sold by Stampin' Up! to make a calendar board, where you could change the outfit on the bear to fit the season. Again, here she ran into a few bumps, but did have a final project to share. Laurie actually dressed her bear up more appropriately.

Finally, one last picture to share. I was using a lot of scraps cutting out the 4 bears and accessories and Laurie's cat (Oscar) decided that right then and there it was a good place to take a nap.

Things I Learned:
1. It took me almost 6 hours to cut and mount the four bears.
2. If the magnet it thin enough, the sizzlet will actually cut through it.
3. The more layers of clothing, the less chance of them staying on the bear with movement.
4. The magnets do sometimes "fight" with each other and so the layers won't exactly lay where you want them to. (The magnetic fields oppose each other).
5. To get the bear to hang vertically and have a chance of keeping clothes on them, it's best to stick magnets on the back to the bear that will also stick to the clothing. Laurie did this using little closure magnets and it kind of looked like the bear was in the hospital with electrodes on him all over.
6. It's best to run the whole sheet of magnet through the big shot and then cut the accessories separately and adhere to the magnet (at least to save magnet and ensure each accessory is the desired color).
7. A spin off number 3, consider gluing a couple of layers of clothing before adhering to the magnet. For example, I glued the jacket to the T-shirt and then made the combination one magnet to eliminate a layer.
I'm sure there are many more things that I forgot, but before I make this a class, I think I really need to simplify it, so any suggestions would be great.
Monday, August 17, 2009
Stampin' From Our Hearts
Here are some pictures from the event I helped with on August 9, as promised.


This was at the packing table where the creators could insert a piece of paper explaining the card was handmade by blank, and the creator could put their name in the blank. These three girls decided to put their names on every card that wasn't already claimed by someone else (which turned out to be quite a few as lots of the Girls Scouts assemblied in assembly lines).

Here is the sign that I created using some of the pictures and letters received from the troops that have previously received cards from Stampin' From Our Hearts. I used the cricut cartridge Base Camp to cut out the letters.

Finally, here is a picture of a couple of the troop leaders and Girl Scouts representing all the ages that participated with Laurie (the other demo helping with the event) and the 1143 cards that were created in under 2 hours!!

Tuesday, August 11, 2009
Oops! Multiple Posts
Opps! I scheduled posts to post over the weekend while I was busy preparing for the Stampin' From Our Hears event, but I never actually hit the publish post button. So now they are finally posted (with the dates I originally meant to post them). Here are also a couple of pictures taken while preparing.
This one is of me putting my earing back in after using it as a paper piercer because I was too lazy to walk upstairs to find a real one.

This one is of some of the shoeboxes that were prepped with everything that needed to be on each table to make the various cards. We had 13 different boxes in all.

Finally, I wanted to report that in total we made 1143 cards in under two hours! Stay tuned tomorrow for some pictures at the event. Thanks to everyone for all their hard work!
Sunday, August 9, 2009
Last of the Holiday Cards
Well, today is the day and by the time you're reading this Laurie and I are probably knee deep in cut cardstock and hopefully completed cards. Here are the last of the cards that we created that I have pictures of. There is one more, but it's made from non SU! cardstock that was donated to Stampin' From Our Hearts.
This one is a card that Laurie designed that again used retired DSP and in-colors. The stamp sets used were Snow Swirled and Many Merry Messages (again, I think).

The last one that I have to show with you also uses Snow Swirled and the retired Kiwi Kiss cardstock and satin ribbon. The greeting is from Season of Joy.

Stay tuned next week for the final number of cards made and pictures from the event!
Saturday, August 8, 2009
More Holiday Cards
Here are a couple more cards that Laurie and I designed for the Stampin' From Our Hearts even tomorrow.

The first one uses Punch Pals and retired DSP (Laurie actually designed it). Along with Close to Cocoa, Kiwi Kiss, and Baja Breeze cardstock. The Merry Christmas is from Many Merry Messages (I believe). We will be making about 100 of these cards.

The next one uses three current sets Seeing Stars, the Star jumbo wheel and Season of Joy (for the greeting). The paper is Riding Hood Red (retired) and the Riding Hood ribbon is also used. We will be making 200 of these cards.
Stay tuned tomorrow for a couple of more cards that we designed for Stampin' From Our Hearts.
Friday, August 7, 2009
Happy Kwanzaa!
As I mentioned before, I am working with From Our Hearts (see button on side bar) and the local girl scouts to make about 1200 holiday cards for the troops. The event is on Sunday from 1 to 5 PM at the Champlin VFW and over the next couple of days I will be showing the cards that Laurie (fellow demonstrator) and I created. Some of them do use retired cardstock, but could be easily be replaced with current colors. The first one I'm going to show is a Kwanzaa card that I created using the Happy Kwanzaa stamp set. I am not very familiar with Kwanzaa, but I hope this card does it justice. Any suggestions would be appreciated. Paper: Crushed Curry, Real Red, Basic Black, Glorious Green (I know the picture does not show these colors very well). Ink: Basic Black, Real Red.


More Holiday Card Shares
Here are two more cards that I designed for the Stampin' From Our Hearts event on Sunday. These both use current colors and stamp sets.
The first one uses the Season of Joy stamp set with Glossy White, Brocade Blue and Night of Navy cardstock. We will be making 200 of these cards.

The next one uses Christmas Punch (new hostess set) and Bermuda Bay, Night of Navy, and Whisper White cardstock. We will also be making 200 of these cards.

Stampin' from Our Hearts is also looking for donations to help cover the cost of packaging and shipping. Please visit their website (button on my left sidebar) for more information and to make a donation.
Thursday, August 6, 2009
Top Note Matchbox Tutorial
As promised, here is the tutorial for the top note matchbox posted here. While everyone else is enjoying convention, you can have some fun of your own. Please let me know if you have any questions. I will post more step-by-step pictures when I get home. This is my first tutorial, so any feedback will be greatly appreciated.
Enjoy!

Supplies:
8 ½ x 5 ½ thin chip board (cereal box, cardboard from DSP, etc)
8 ½ x 11 DSP
12 x 12 cardstock
Sticky Strip
Big Shot
Top Note Die
Matchbox Die
Oval punch
2 ½ x 4 transparency sheet
2 jumbo eyelets
6” wide ribbon
Crop-a-Dile
Directions:
1. Cover both sides of the chip board with the DSP and cut out two Top Note Dies. These will be the top and bottom of the box.
2. Cut out two matchboxes and two sleeves using the cardstock. Assemble the box as instructed.
3. Adhere the middle section of the two sleeves together. Make sure the score lines line up for the rest of the sleeve and the shorter tabs are on the same end.
4. From the shorter end of the tabs, punch the oval out of the two sleeves. Slide the paper all the way in and center (this ensures the holes are in approximately the same place on both sleeves). This will be used as a template in step five to determine where to punch the ovals in the top note.
5. Center the two holes on the back side of one of the top notes and mark the holes with a pencil. This ensures the holes will match up when assembled. Take the oval punch and punch the two ovals out of the top note. Note: Other shapes can be used, but not all with punch through the chip board, so a test might want to be performed beforehand. No responsibility is taken for damaged punches.
6. Finish assembling the two sleeves, using sticky strip to adhere them.
7. Attach the transparency sheet to the bottom of the top note with the holes.
8. Line up the ovals on the tope note and the sleeves and adhere with sticky strip. Please the tape on the sleeves rather than the top note to ensure the adhesive is only where the two meet.
9. Adhere the bottom of the top note to the bottom of the sleeve, again using sticky strip on the sleeve.
10. Using the Crop-a-Dile, set the two jumbo eyelets in the matchboxes.
11. Thread 3” of the ribbon through the eyelet and tie in a knot inside the box. This will be the pull for the drawer. Repeat on the other drawer.
12. Decorate as desired.
Subscribe to:
Comments (Atom)

.png)